Would you like to make this site your homepage? It's fast and easy...
Yes, Please make this my home page!
The Perfect Captain
"I believe that in four weeks from the time a declaration of war is heard on our
frontier, the whole of Upper Canada and a part of Lower Canada will be in
our power."
- Representative John C. Calhoun, 1812
Welcome friend, to the page that asks, "King or Congress"?
---------------------------
Contact us
The Perfect Captain
---------------------------
A Free set of miniatures rules for the War of 1812 and
American Revolution, representing company level
actions of roughly 150-800 men per side, provided with
full colour graphics.
A companion game to Cousin Jonathan, sim'lating warfare of that smaller sort
Hendersons Plantation, South Carolina, 1781
Hello fellow Loyalists! The good news is we managed to beat the rebels out of Henderson's plantation and get our supplies and guns through from Charleston to Camden. The bad news is we lost a lot of guys doing it....
It's 1781 in South Carolina (in our Swamp Fox campaign), and Col. Black of the 63rd foot is tasked with bringing supplies from Charleston to Camden through territory swarming with rebels. He needs to get the wagons through regardless of obstacles or the Camden garrison will become demoralized. At his disposal are two companies of his own 63rd regiment, a company of Hessians from the Von Bose regt, and one from the 71st Highlanders recently evacuated from Cheraws. He also had a vanguard composed of two companies of South Carolina Loyalists, a troop of Loyalist Dragoons, and a small company of New York Volunteers. The vanguard was to enter ahead of the main body and clear a path for the main body. All told the Royal forces added up to about 560 men and two guns.
The Rebel vanguard had arrived at the plantation the night before and built a hasty roadblock of logs on the main road, and stationed their men in ambush and guarding the roadblock. It was composed of Some North Carolina state militia, Some South Carolina riflemen and a troop of the 2nd Continental Light Dragoons, in all about 160 men. This small delaying force needed to hold on until the main army arrived, which was composed of a company of the 1st Maryland continentals, one of 2nd North Carolina Continentals, a large company of South Carolina militia and small company of Maryland Light Infantry, in all 360 men.
Also, battlefield, uniform, and historic site books printed by:
The Old Fort Niagara Society:
Uniforms and Equipment of the United States Forces in the War Of 1812
War Along the Niagara
The Niagara Historical Society:
The Battle of Queenston Heights
The Battle of Fort George
The Battle of Lundy's Lane
Osprey Books:
The American War, 1812-1814
Wellington's Army
Mackinac State Parks Society:
The British Army at Mackinac
Old Fort York National Historical Site:
The Battle of York
Fort Wellington National Historic Site
How about some Patriots links?
Causes of the American Revolution
A fairly unbiased account of the reasons for the Independence movement.
A rare find.................... (Sorry, the Captain is a Tory!)
The Patriot Resource
A good basic source of info on personalities and general background
Revolutionary War battles
A omprehensive list of engagements from the period
Uniform Guide
Painting up a few units? This will be of inestimable help
Southern Campaign.....
Campaign!
A rival ruleset and campaign system... well done! We think this looks really good.
RevWar Spies!
Check out this page covering the behind the scenes espionage
and the persons involved.
Thanks Sarah!
and now, a brief account of the
first raid on Black Rock
in the War of 1812, refought by The Captain et al.
The British set up first, placing each company roughly where shown on the scenario card. The Plundering rules were in effect, so all Britsh forces start with a humilated maker on every platoon, and are immobile until approached by an enemy within charge reach! The initiative therefore rests with the Americans, who entered where shown on the card.
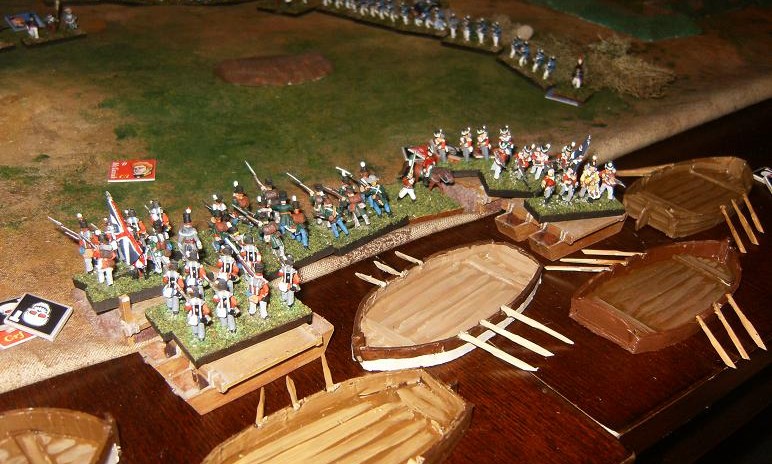
To win, the British have to evacuate via the boats shown below. Since they are plundering, it is not as easy as it sounds- it will be a desperate rearguard action. The Americans need to overwhelm the British as quickly as possible, since the sooner they reach them, the greater the confusion will be.
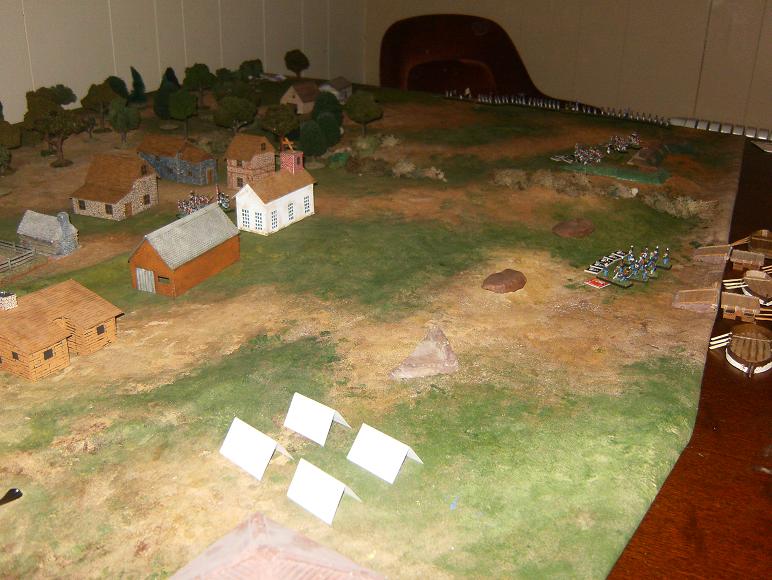
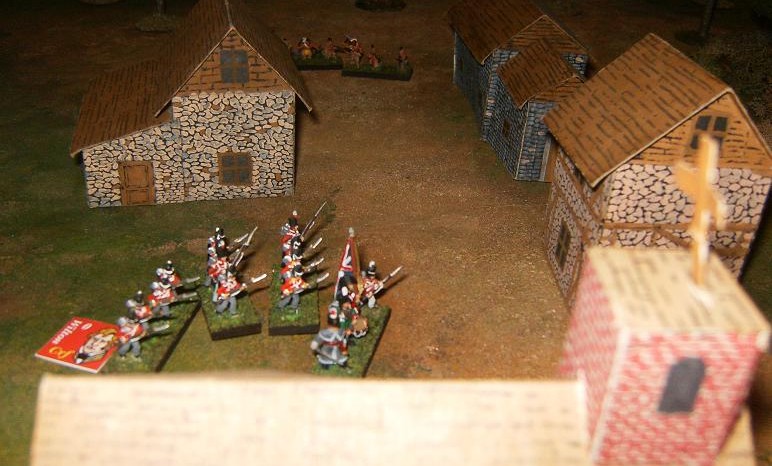
The village of Black Rock
The Americans indeed came rushing in near "Fort" Tompkins where the main British force was demolishing the works. Since they were in range the British could begin to slowly gather their troops, represented by removing a single humilated marker from each company as their turn's action. Once the enemy gets too close the humiliated markers become permanent, dragging down morale and effectiveness.
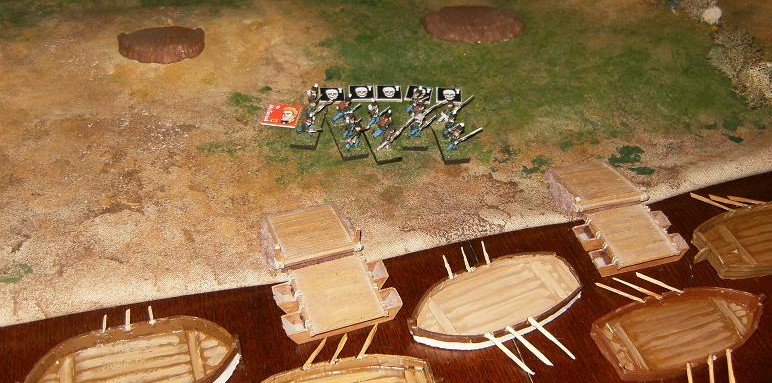
Canadian Militia "guard" the boats (actually they are piling barrels of salt Pork and other stolen goods aboard).
The British pulling apart the American fortifications
The Light Company of the 8th torching the town
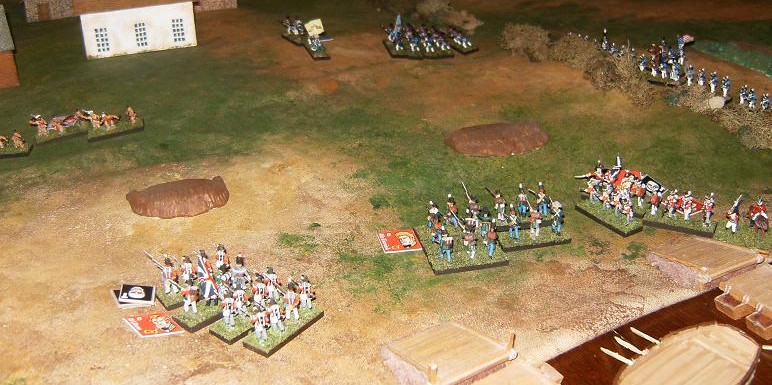
The British near the Fort were fairly shaken up, one company of three platoons getting stuck with two humiliated markers. The other company was in fine form, but now the American's were upon them. Should they run or fight? Counting on superior discipline, Bisshopp called for a charge, but two turns running the 41st wouldn't budge forward. The British plan to give the Yanks a bloody nose and retreat was not working out...
Indians creeping up on the 8th Foot from the woods to the east
Things went from bad to worse for the British in the Fort. Unable to charge, too disorganized to fire effectively, the Americans fire a volley or two and then charged. One British company tried to stand but was routed, sweeping the other company with them. The retreat became a rout.
The Lights in town were stunned to find Indians rushing into the town from the woods! Dropping their torches they found they were too scattered to resist, even though outnumbering their enemies. They found discretion the better part of valour and ran headlong for the boats, keeping an eye on their pursuers, ready to turn on them if necessary. But with only one effective platoon, it was too risky to stand.
The 41st couldn't get away fast enough! They were pinned against a stream and *gasp* SURRENDERED!
It was looking like the only thing going to save the British were the *gasp* SEDENTARY MILITIA OF UPPER CANADA!!!!!
Saville won't be getting a Christmas card from the King this year....sniff
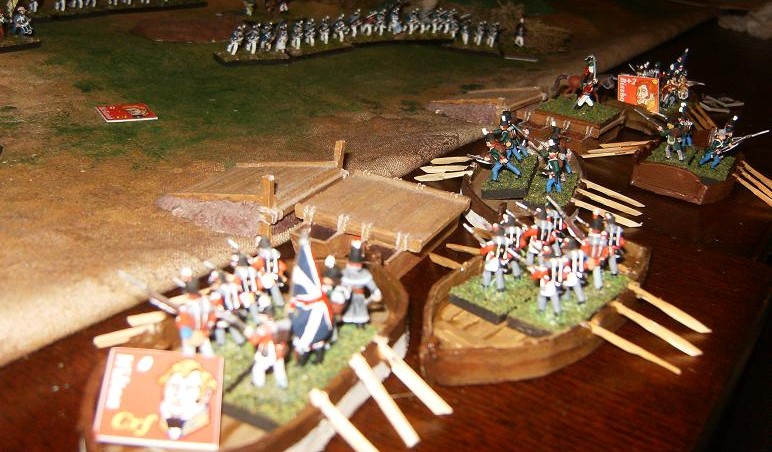
The perimeter shrinks...you guys know how to swim?
Seeing the regulars falling back, some in rout (Bisshopp only rallied the 41st on the dock!), the Lincoln militia bowed to the inevitable and retired to the beach under fire. Now it was a race.
Although they would have liked to bag the whole army, the Americans had to content themselves with seeing the enemy off their shores.
Epilogue
Aside from the fact that Colonel Bisshopp escaped unscathed, it was a virtual repeat of history! The British didn't get a shot off the whole battle, and failed almost every morale roll and all of their charge rolls. The Americans might have beaten them to the beach if they hadn't stopped to dress their lines a few times.
Check out the new cover we made for the rules!
After Action Reports
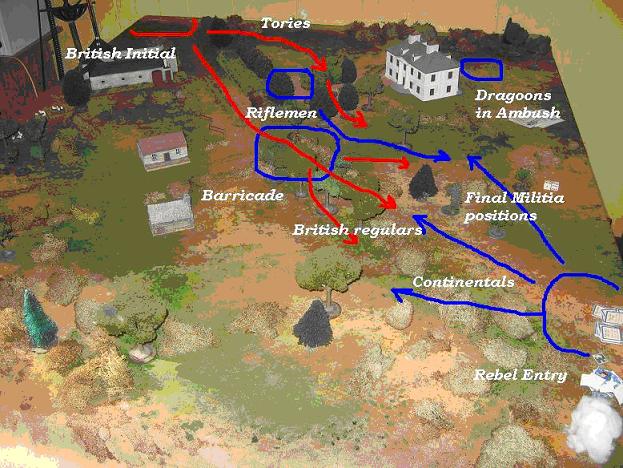
Here's what the battlefield looked like:
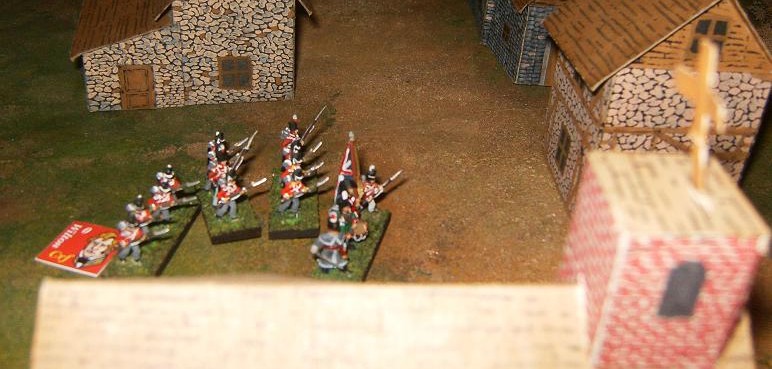
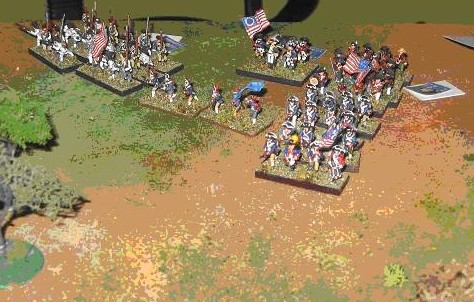
The Rebels (or Patriots for the disloyal among us) set up their Dragoons behind the main house, supported in the orchard by the riflemen, with the militia holding the roadblock.
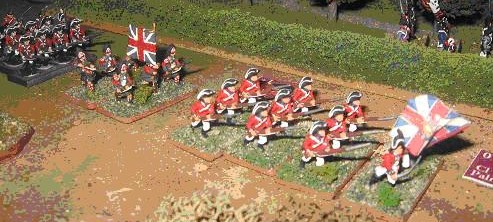
The Loyalist vanguard entered as shown here (I had to borrow some Patriot militia figures as I was short of my own). Note that we used John Bull leaders, as we couldnt find our Patriots stuff!
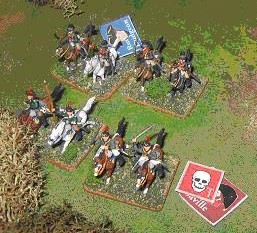
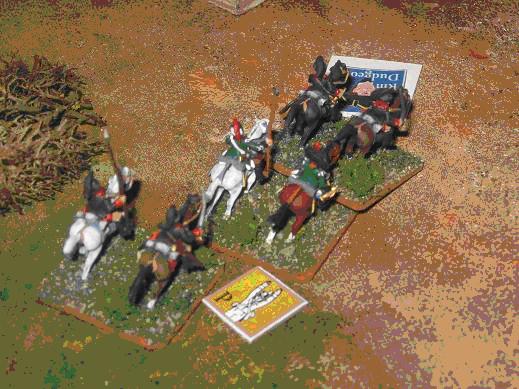
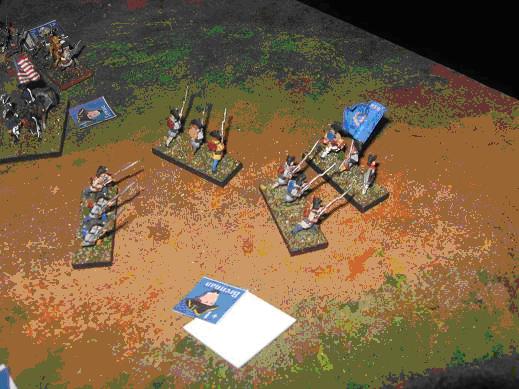
Thanks to some bad scouting we blundered into both Ambushes set up by the rebels- our Dragoons ran full speed into the trap set by the Continental Dragoons and our Loyalist militia came into the sights of the riflemen. Both routed
.. worse, the Loyalist Dragoons were annihilated and a squadron was even captured! The shame!
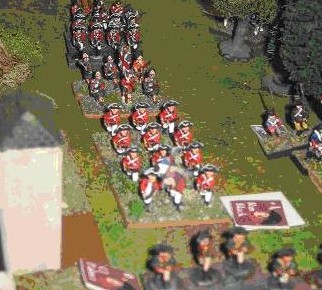
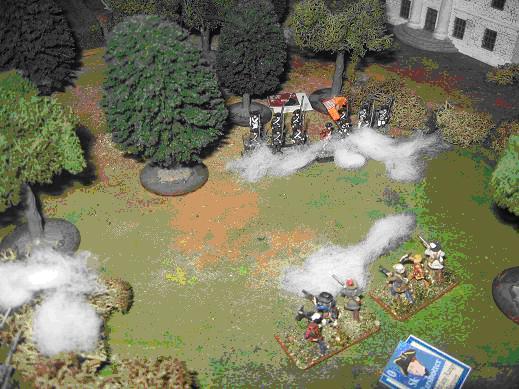
With the Continental Dragoons carting of their prisoners to the main house, the Loyalist militia rallied and the New York Volunteers chased away the riflemen, stabilizing the situation somewhat. Not a moment too soon, the rest of the British army arrived, led by Jaegers:
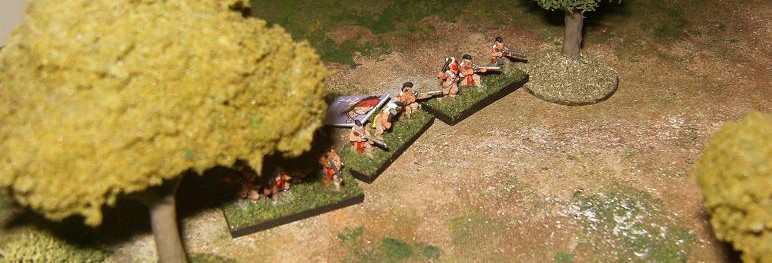
With the troops boiling down the road in a bad mood, we were on easy street for a while. The Jaegers covered the column keeping the heads of the militia down at the roadblock with some excellent shooting. Meanwhile, the Tories marched into the trees in front of the main house skirmished with the rebel riflemen and Dragoons.
I should mention at this point that we were trying out our new command rules. We had to write out our initial plans, brigade our troops and give them orders that had to be adhered to (new set of counters for this). We also had to draw out a map of the board and drawing in our avenues of approach. They were easy to use and satisfying when you used them, even though it often held you back from doing what you wanted.
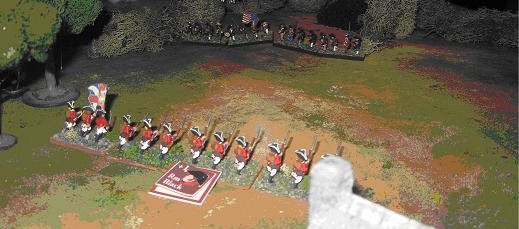
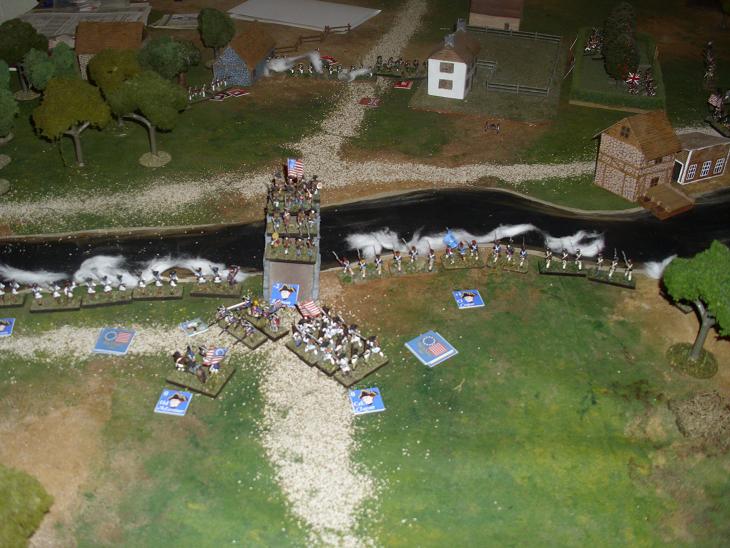
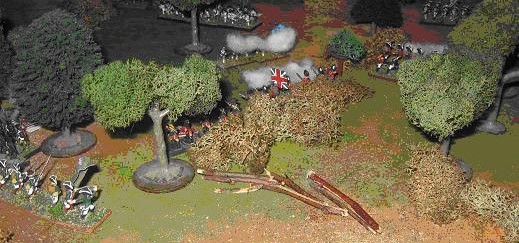
Finally the spearhead made it to the barricade
The puny militia folded and ran away in the face of the surging bayonets. The British had taken the roadblock.
Unfortunately it was at this point that the main rebel army showed up down the road from the victorious British.
On the other side of the field the Loyalists broke into the main house, rescuing the Dragoons who had been taken prisoner. They made for the baggage and did not contribute to the battle. Neither did the guns by the way, being stuck amongst the supply wagons which were guarded by the Germans. The Loyalists occupied the top corner of the house firing down on the rebels for the rest of the scenario.
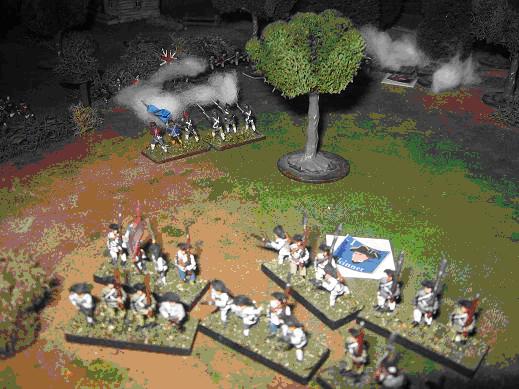
More Patriot militia fleeing after the heroes of Fort George (the house occupied now occupied by the British) picked off their commander. This sent the rebels to the brink of disaster. Note their dead officer torn in half near the hair that had fallen out of the rebel players head.
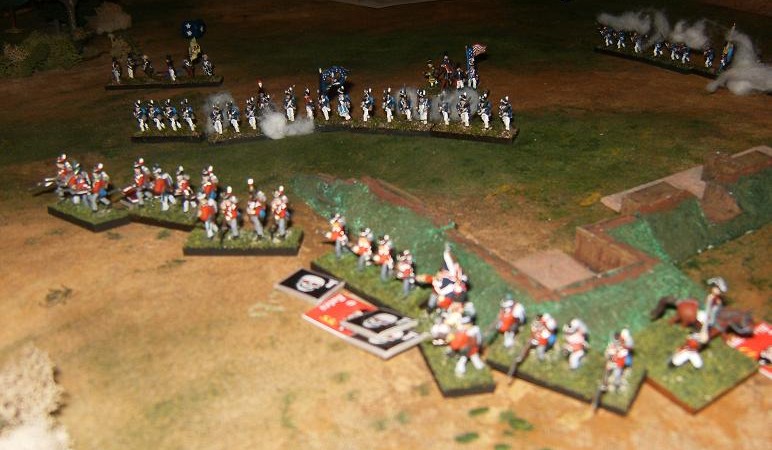
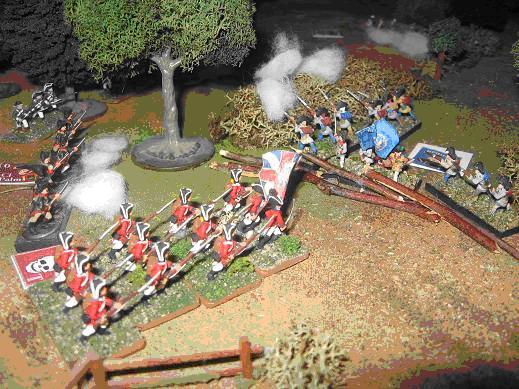
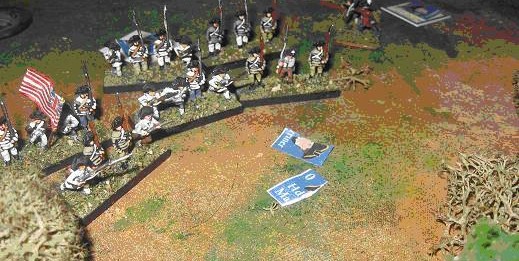
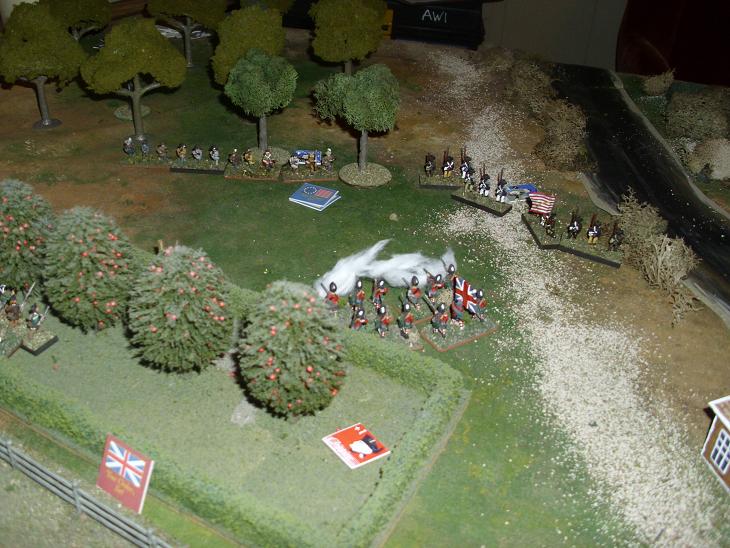
Now the British advance down the road and the sides of the hedges, expecting to see off the enemy easily. They did not count on the Continentals who started to gun them down like skeet.
The two companies of British were greatly reduced, causing the Rebel player to think seriously of a bayonet charge to see them off. They actually tried it once but were driven back by fire.
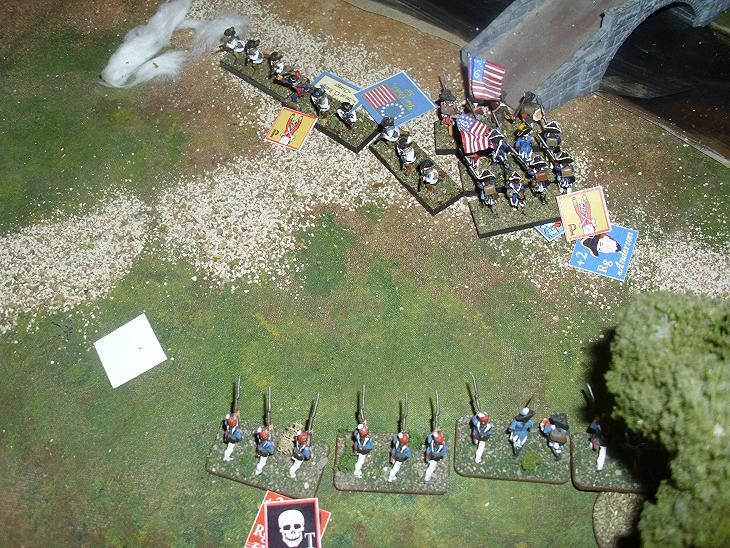
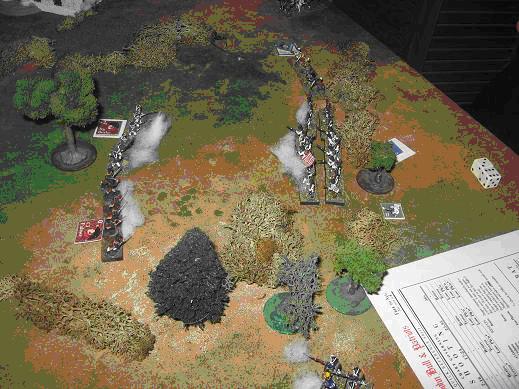
The Highlanders and the Jaegers jumped the hedge and went after the Continental lights, and a nasty firefight developed, with half of both armies blazing away at each other, some from cover.
The Rebel militia out in the open suffered from Fear and other adverse morale modifiers (they are not open field troops). They routed and came back to the fight, but were always on the edge.
The Highlander decided to break the deadlock with a charge on the Lights. Sadly they were gunned down and bayoneted out of existence, breaking my heart!!!! But I had my revenge as the Tory regulars charged them in the flank, mopping the floor with them!
Finally the Tory Volunteers broke the Rebels back with a desperate charge against the wavering militia. With only two platoons and one terror marker, they managed to scare the militia clear off the board, ending the game in a costly British victory after 17 turns.
Typically, we had a great time. The close board broke the battle into numerous little engagements that gave that special Actions! feel. The new rules really changed the way the game played, and the new components looked great.

Morsink Mill, New York, 1777
It's 1777 in Westchester, NY, and some Patriots under Col. Marnier are looking for some supplies. With a force of Connecticut Continentals, some Pennsylvania Riflemen, New york Militia and a medium gun (about 800 men), he has marched by sly paths to the British outpost at Morsink Mill to give them a black eye and steal their flour. The King's forces were alerted however and called on nearby posts for reinforcements. The garrison (under Col. Phelps) was composed of a few companies of New Jersey Volunteers, a company of Hessian Light infantry and a handful of Jaegers. They also had a light gun.
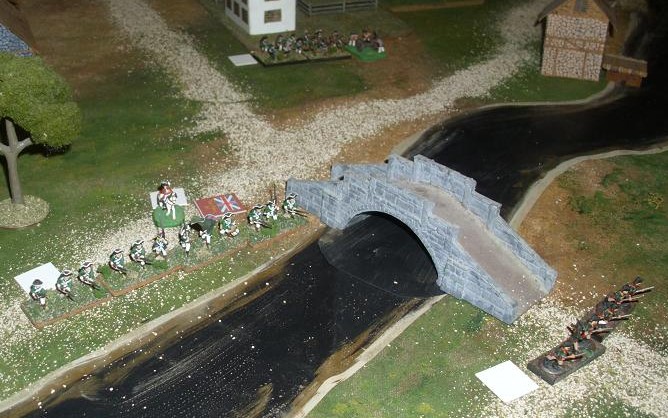
To get at the enemy the Rebels had to cross the single stone bridge directly in front of the garrison. To support the attack they sent two companies of Veteran Continentals on a flank march to find a ford downstream, but they couldn't be sure when they would arrive. The British needed to hold them off until their own reinforcements showed up.

The British set up to defend the bridge in such a way that they could buy time and inflict maximum damage. The threw the Jaegers over the bridge to dispute the enemy advance, while putting the Tories within short range of the bridge. They hid the Hessian Light Infantry in the woods near the bridge, with orders to charge with the bayonet whatever came over. The rest of the troops had "Stand Your Ground" orders.
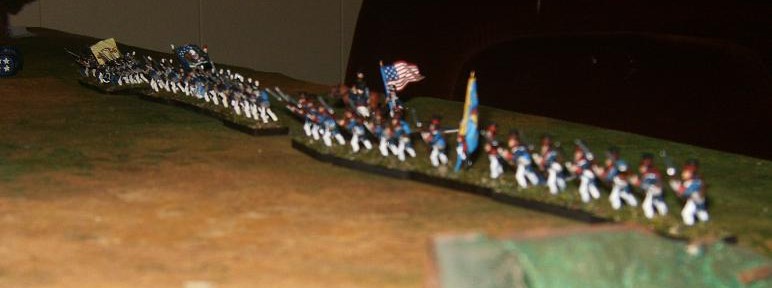
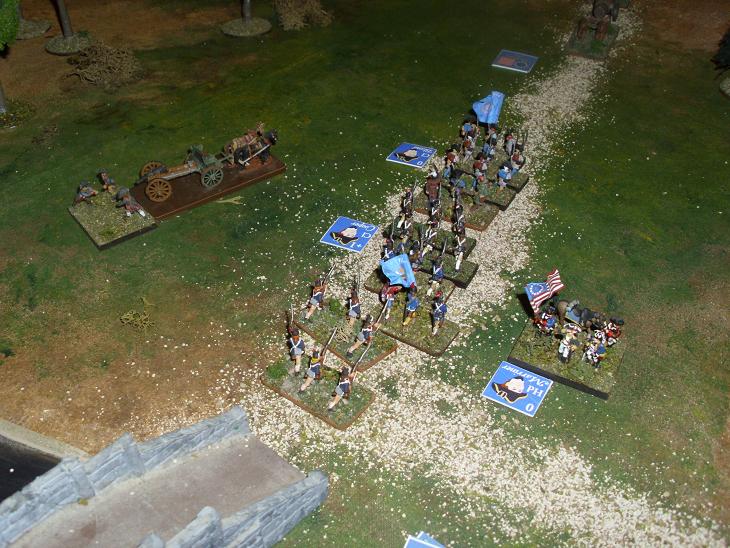
The Patriots entered in a vast column with some very tough Light Infantry leading. Their plan was to set up the Lights and the Riflemen on either side of the bridge and shoot down any defenders thinking of rushing it while their own men would cross. Their gun covered any defenders who tried to defend the buildings and make a strongpoint.
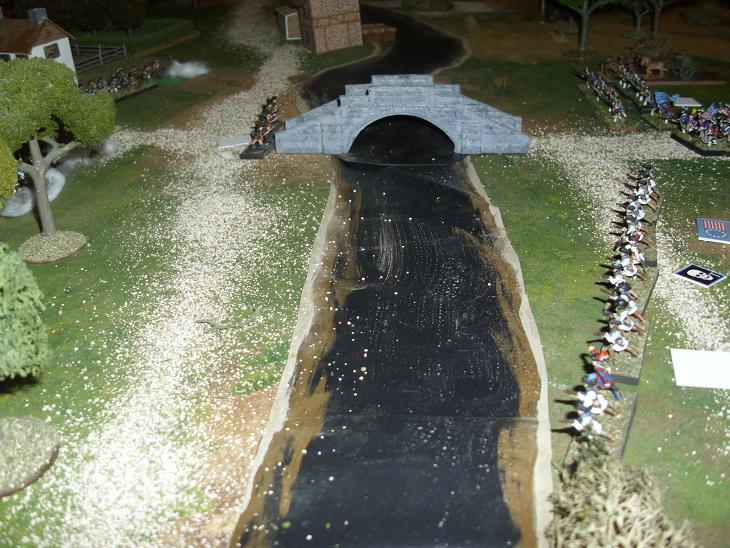
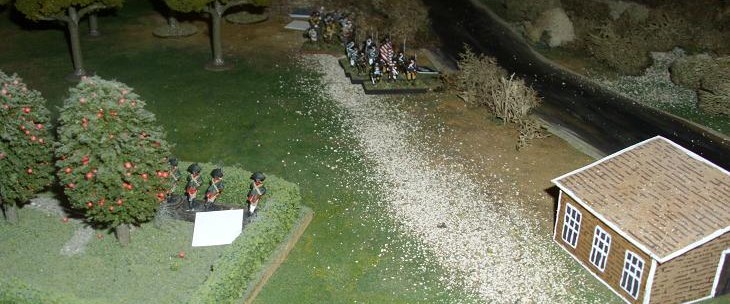
The Patriots came on strong, brushing the Jaegers aside (over the bridge actually) and took up positions on either side of the bridge- the Light Infantry on the right, the Riflemen on the left. In the ensuing shootout, the Loyalists were obliged to fall back to long range, and then out of range, of their opponents. The bridge was ready for crossing!
Here they come!
The New Jersey boys are ready!
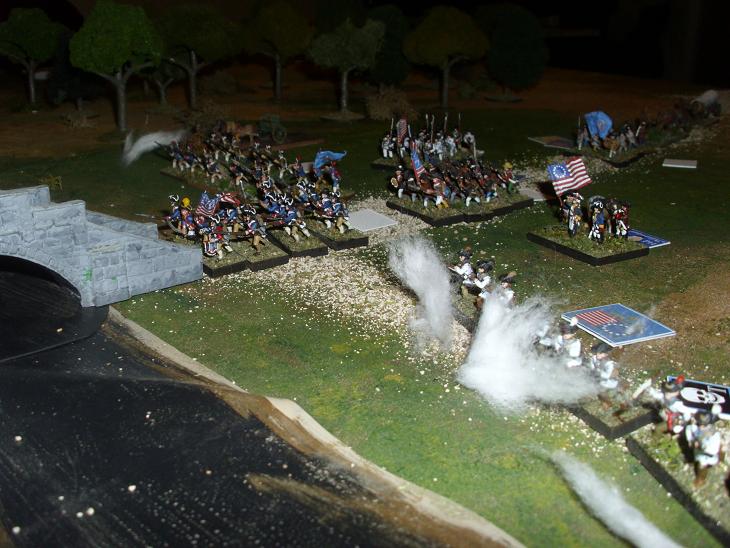
Coming over the bridge, the first company, some New Hampshire Continentals, are rushed by the Fusiliers wating in a crook in the woods (no pic, sorry). Bayonet to bayonet, the Germans beat the Rebels and force them back to the bridge, causing a hug log-jam! It would have been the end for the assault force (they had been forced back by fire on the bridge several times) if it were not for the Pennsylvanian Riflemen creating a no-mans land on the opposite bank. The Hessians were forced back to join the Loyalists, while the bridge traffic is cleared.
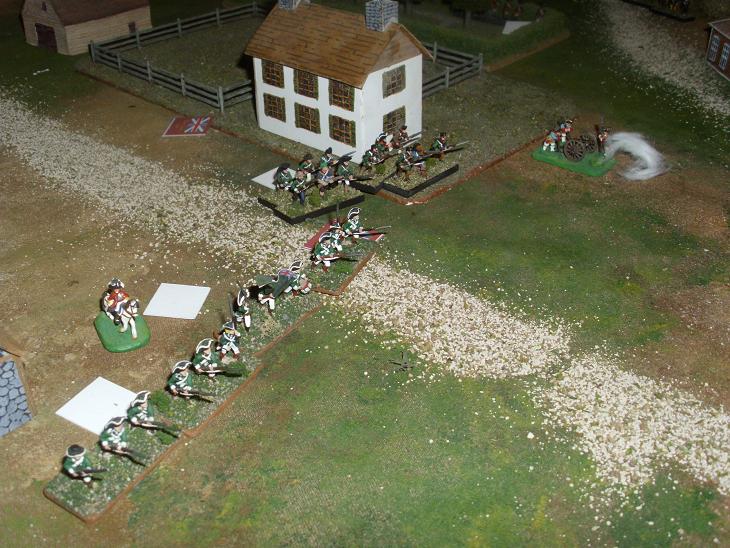
Meanwhile, the Patriot flanking force arrived, sucking the Jaegers out of the firefight to save their flank from being rolled up. Unbeknowst to this newly arrive brigade of Continentals, British reinforcements had arrived (thanks to some amazing dice-rolling!). Unfortunately for the British, the written orders for the relief forces were to march to the bridge and counter-attack. Now bad rolling struck, making it difficult for them to have their objectives changed. By the time they sorted themselves out, the Jaegers were crushed in trying desperately to hold the orchard.
The relief force and the Continentals tangle on the edge of the outpost. It was touch and go for a while, with the orchard taken back and forth, until the British overpowered their opponents and chased them off the field!
At the bridge, the Patriots go for broke, sending everything they have over the bridge. It looked bleak for the British; they couldn't hold the bridge against such odds, but they were determined to shoot it out, despite mounting casualties. Back and forth it swayed; but losses proved too great for the Rebels, and the Militia reserve took to their heels, forcing the Continentals to see the game was up. "Throw down and we'll give you good quarter!" shouted the British player. "Do your worst!" was the reply; the nearest Loyalist unit fired into the heaving mass backing up toward the bridge, and they started to surrender. A close victory for the King's men!
The final retreat............