The army of the queen hath got the field: My uncles both are slain in rescuing me; And all my followers to the eager foe Turn back and fly, like ships before the wind Or lambs pursued by hunger-starved wolves.
Richard, Duke of York- Henry VI Part III
Welcome friend, to the page that asks, "York or Lancaster" (or Tudor) ?
---------------------------
Contact us
The Perfect Captain
--------------------------
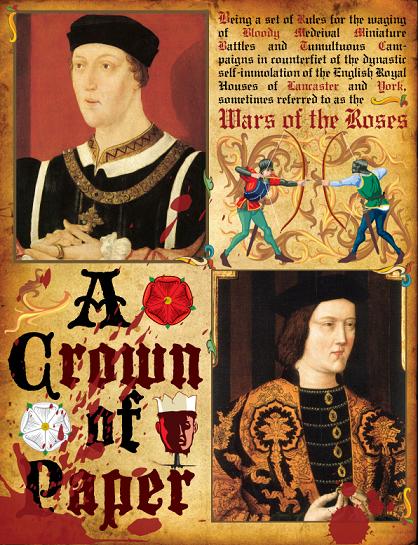
THE WARS OF THE ROSES are ON!
Between 1450 and 1490 direct usurpation was the rule rather than the exception. Around a half dozen men claimed the crown of England-Henry Holland, Richard of York, Lambert Simnel and Perkin Warbeck failed. Edward Earl of March, Richard Duke of Gloucester and Henry Tudor succeeded. Henry of Lancaster possessed it twice, while his son was dispossessed once.

Miniatures rules unlike anything you've seen before
We don't think that's an idle boast, and we don't make it lightly... these rules have been in the making for almost ten years. We've poured our hearts and souls into them! The graphics alone should give you pause, while looking at the individual Noble cards should give you a hint as to how much historical research when into them.
Just as important, the systems in this game are chock full of novel systems and historical flavour without being bogged down with minute details that halt the flow of play. You always know where you are and how you got there, the trick being to get yourself out of the jam you just got yourself into! Maybe it's best to look at the pages and pages of play examples we provide, or just look at the replay below.
Special scenario rules for odd occurances? Nope.
How do you refight Bosworth without a pile of special rules for the Stanley's treachery or Northumberland's hesitance? What about Warwick's confusion at St. Alban's II, or Grey's treason at Northampton? How does Somerset get tempted off the hill at Tewkesbury? What about Fauconberg's trick at Towton? Using devilishly slick and easy mechanics, you can not only recreate those occurances when refighting famous battles, they will happen in battles you generated with our Campaign game!
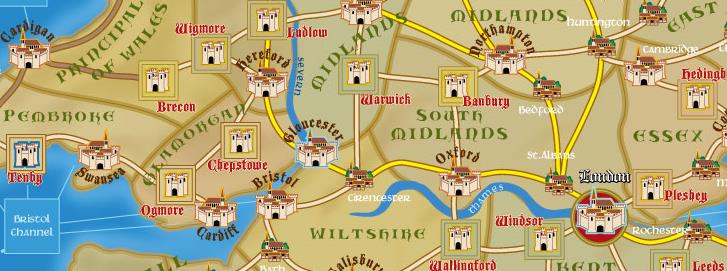
Click on the map to take a look at the Campaign System!
Aren't Wars of the Roses battles just giant scrums and therefore boring?
No, they're not, at least the way we work them. Each hand-to-hand encounter with the enemy is like a little game of its own. Both sides get six cards with different tactics you can employ- lead with your Nobles, call for a supreme effort (dangerous if the men aren't up to it) thrust and poke at them to keep your casualties low, gather into a tight-knit unit around the standards to make it hard for them to break in amongst you, or go all-out with daggers drawn for maximum execution. Each card has its strengths and weaknesses you will used based on the troops and nobles engaged and even inhow the battle is going in other wards. Delay or try to end it quickly? Go for casualties or go for the leaders?
What about Archery?
Depending on your battle plan, each ward will issue archers with the type and amount of arrows needed to succeed. Flight arrows are good for long range, but lack weight. Sheaf arrows are heavy but for close range. More than that, timing really counts. You can try and stop an enemies advance cold, and disorganize his attack. You can try and force him to rush you, or come out of defensive works. Or you can just try to kill as many of them as you can. It's your choice.
Are Noble commanders important?
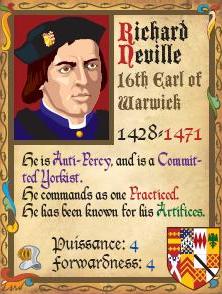
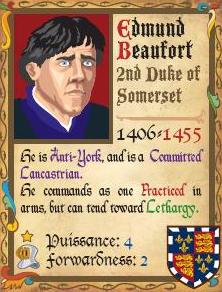
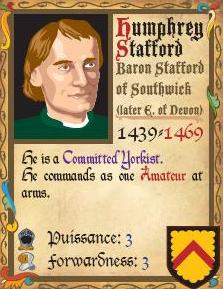
The whole system depends on who's in command. Their Loyalty to the cause will dictate how long they intend to fight and with how much enthusiasm. Some Lords are Committed, some Well-Wishers, and some Trimmers. Further, each has a Puissance rating that gives his prowess in leading his company when it comes to handstrokes. Most importantly however are his command characteristics. Edward of March is Audacious- lots of initiative, capable of choosing all kinds of stratagems before play begins, like Forethought, the ability to come up with a required order he didn't prepare for. Some Nobles are Old soldiers, like the Earl of Salisbury, capable of solid tactics but a little staid. Others are Practiced, and still others, Amateurs. There are a number of Lords that have Dangers, Such as Impetuousity, or are Timorous, which can lead to very bad decisions at critical times...
The Van, led by Jasper Tudor, Earl of Pembroke, chooses a hasty attack. This will allow him to get to grips quicker and spend as little time as possible under the arrow storm, while disorganizing his attack slightly. He faces Devereux, with whom he has emnity, meaning they will single eachother out for "special treatment" if they meet.
The Main, led by Owen Tudor, decided to Await the Foe, meaning he has more flight arrows and less movement. Facing Edward of March, he's naturally nervous. He'll try to hurt the enemy with arrows and then come to blows, but Edward will have to come to him if he wants to tangle. Again, the system is so slick and easy to use I was really impressed. All the fun of tactics without the pain- and it gives a historical result. I'm in love! ...where was I? Oh yeah. I should also mention that Owen Tudor and Jasper Tudor (Pembroke) were both Practiced commanders, and therefore had a choice of a strategem. Owen chooses Stout Ensign, which meant he could avoid become a casualty one time by his ensign taking it on the chin for the team. Pembroke chose Inspiration which meant he could attempt only once, to raise the courage level of his ward by one.
Suddenly Herbert halted, costing himself an approach chit. He started shooting at Wiltshire's ward with deadly effect even at flight range, causing casualties but no loss of courage. Wenlock went next, but since the Lancastrians were not in range called a halt, also sacrificing a precious approach chit. The rest kept advancing.
Wiltshire's ward then halted and fired off a feeble volley without result. Crossbows at flight range don't pack a punch, and his levies aren't much better. Edward's ward now halted to loose a few arrows, falling short, with his other company shooting at the Welsh Spears while out of range due to the ward's orders. Now Pembroke halted to fire! It seemed no one wanted to be on the receiving end of an arrow storm while marching, probably one of the reasons that the bow was not as effective in English vs English battles as they were against the French! Fortunately the Lancastrian barrage was successful causing casualties and a courage drop on an enemy company.
Wenlock, an "Old Soldier" chose Sharp Archery as his stratagem at start, so his men were deadly. However their first volley had no result against Pembroke. Herbert however was out of flight arrows- he didn't expect a long range archery duel when supplying his men. He used his Sheaf (close range) arrows at long range with a negative modifier, but managed to devastate the French and Irish Mercenaries, who lost courage and casualties! Wiltshire's ward was wilting...
Herbert crashed into Wiltshire's ward- his own company taking on the French and Wiltshire, while Hastings took on the battered Irish. In Herbert's engagement, both sides decide on what tactic they will use. Looking through their identical sets of cards, Wiltshire chooses I'll not shrink back! in a surprise move, since his puissance rating is only two, not adding much to the attack while causing Wiltshire to take a personal casualty check. This catches Herbert off guard- he chose Pluck up your courage, risking the loss of a courage point to gain an extra strength card draw. In the end, Wiltshire's gamble pays off- Herbert is repulsed half a base length, with the Lancastrians following up. Next turn they will have an advantage. in the other engagement Hasting's Pluck up your courage pick against the Irish Thrust Home Lads option gives them an advantage, pushing the Irish to the brink of disaster. They fail the courage test and are discouraged- next failure will break them.
In the centre Edward crahes into Owen Tudor's company with his own AND Audley's- the Welsh Spearmen are too far back to help yet. Tudor chooses to Thrust Home, hoping to keep the battle from getting too serious yet until his Spearmen can participate. Edward guesses he'd try that and chooses I'll not shrink back adding his impressive five puissance points to the engagement winning by a single point. Tudor is wounded and his company belaboured, a
devastating result! Is this the end of Owen Tudor?!?! Not by a long shot, loyal
Lancastrians!
Wenlock and Devereux's companies are hit by Pembroke and Skydmore using a quick attack before Wenlock can fire off his Sheaf arrows! Ha! Don't you wish you drew the chit first! The engagement does not produce results, as the Yorkists use the Gather round the standards tactic to keep casualties low and play for time. Curses!
The engagements continue. In fact it is not impossible for an engagement to go on for quite a few turns if the players can't outguess eachother and casualties remain low. However something happens this turn that changes everything.
It's all up for the Yorkists. Our ranks are broke and sudden flight are added to the chronicle- the army is about to disintegrate. Audley, an uncommited commander (and famous turncoat) fails his faltering test after the Welshmen give him short shrift and he is on the run, but not fast enough. He goes into the bag. That leaves Hastings who is pursuing the Irish. He mounts a swift horse and escapes, as does Edward. The battle is over.
Only one thing left. The Block phase, where the captured leaders face swift justice. Audley is pardoned and sent off to Pembroke castle for safe keeping. Devereux is a different story. He is Anti-Tudor according to his card. Flipping it over, I see that historically after the Yorkist victory he personally led Owen Tudor to the block. That's enough for me! He is executed immediately.
With the Duke of York and Earl of Salisbury dead, Edwards' welsh friends in flight or pushing up leeks, that left Warwick in London alone. We figured he'd join Edward in Flanders. England for Lancaster!
You can believe it man, it's true. I was there.
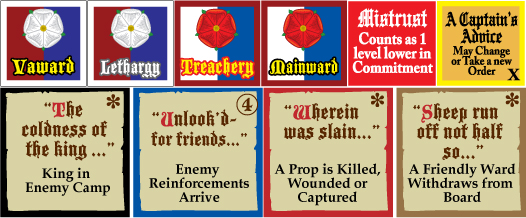
Wouldn't it be great if we had full colour, blow by blow examples of all the important mechanics to really show how it all works? Yeah, we figured that would be a good idea. Pluck a Rose below for each system:
A Campaign AND Miniatures game system
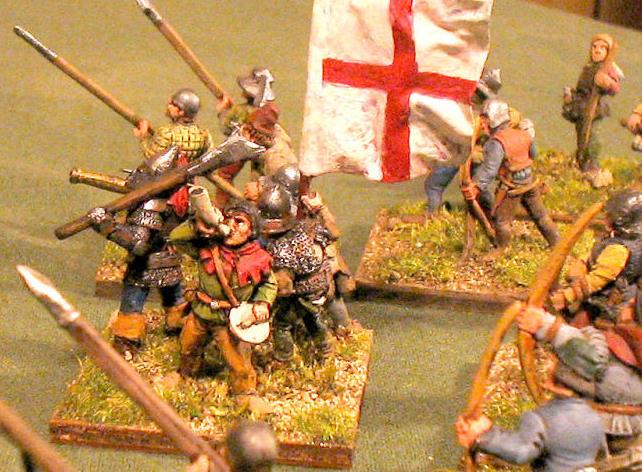
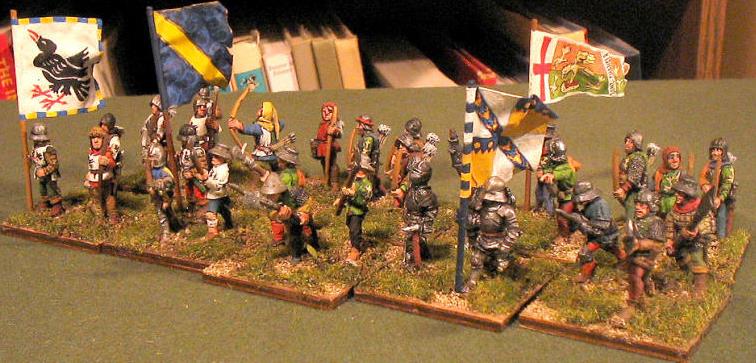
For inspirational purposes, here's a shot of Jack Cade and his rebels!
Approach
Archery 1
Handstrks 1
Archery 2
Handstrks 2
Multiple Hds
Hd Cards
Dangers
Stratagem
Orders 1
Orders 2
Tactics
Conversion
Another note; Wiltshire is an Amateur commander, and has a timorous characteristic. He therefore gets two danger chits on the order sheet- he draws one incompetence chit and loses one action randomly- one of his approaches! Bad news. Furthers, when things go bad, being timorous, he'll take to his heels sooner rather than later...
Worse, he's leading mercenaries. While most companies start with three courage points, they start with two. They also react badly to arrows. This ward might be in trouble, but Wiltshire figures a good steady attack will allow him to face up to Herbert on equal terms- plus he outnumbers the Yorkists three companies to two.

In the common happenstance at the start of the turn (random card draw (note- there are no dice in the game- everything is done by card draw, and they are very interesting) caused the wind to shift to the south, but it had no effect. Edward's ward went first shooting again with limited result, followed by Herbert again devastating Wiltshire's Mercenaries, galling them, even as his men ran out of arrows. This time Wiltshire's return shooting caused some casualties on Herbert. So far no Lords had been injured, but they had to test whenever
casualties are scored.
Now Owen Tudor's arrows began to fall on Edward's own elite
company, causing a loss of courage! This hurt the Yorkist player,
who was visibly distressed. Tough luck! Just because your dad was
executed at Wakefield last Christmas along with most of his
following doesn't move me... I especially liked when Clifford
handed him the bloody hanky ... sorry, where was I? Oh yes,
Pembroke, running out of arrows, let Wenlock have it again
with moderate results.
Just about everyone was running short on ammo, while others wanted to hang onto the Sheaf for closer range. Edward started to advance again, as did Pembroke and Herbert. Wiltshire contemplated backing up, but Herbert was almost on him with a quick attack. Owen Tudor let fly again, and again turned Edward's company into a pin cushion, causing him to falter and lose his last approach chit! Out of options, Edward decided to go in for a piecemeal advance (disorganized) But the time for hand-to-hand had arrived and on he came.
Final Playtest of ACOP ends in a Lancastrian Victory!
After Action Report- Battle of Mortimer's Cross
Tonight we refought the battle of Mortimer's Cross, February 1461. On the
Yorkist side was "Black William" Herbert leading the vanguard (supported by
Hastings), with Edward of March in the Main (supported by Audley), and Wenlock in command of the Rear with Vaughn and Devereux. The three wards were evenly manned, with two companies, Edward's being the elite of the army. Since Wenlock's devotion level was Well-Wisher, meaning lukewarm to the cause, the Yorkists gambled giving him his own ward, but this was offset by his experience being Old soldier (veteran of the French War).
The Lancastrians were a more mixed lot. The Van was lead by Jasper Tudor (Skydmore in support) with the most powerful troops in his ward. The Main was lead by Owen Tudor (Owen Ap Griffith supporting), composed of his following with some Welsh levies (Spearmen). The Rear was of extremely dubious quality, led by The Earl of Wiltshire. There were three companies- one of French Crossbowmen and a smattering of Men at Arms, one of Irish Levies and Galloglaich, and one led by the Earl himself composed of a few household troops leading levy archers.
Since we refought Mortimer's Cross, the Yorkists counted the Parhelion
pre-battle happenstance, allowing them to "forget" one verse of bad news on their chronicle (army morale track). The Lancastrians started with the Time Hath Worn Us Into Slovenry verse due to their force march to the field, meaning they were more brittle than the Yorkists.
In the Herbert/Wiltshire engagment both sides play an "I'll not shrink back" tactic, meaning the commanders fight! Wiltshire's puissance is a pathetic two, while that big bully Black William Herbert's is five! One card draw later and
Wiltshire is dead!!!!! The Lancastrians lose a prop, meaning the Wherin was slain verse is placed beside the "slovenry" verse on the chronicle, meaning the Red Rose's army is getting more brittle. But wait! In the regular casualty check Herbert is cut down! Now the same has happened to both sides. Throckmorton takes over the Ward for Lancaster, while Hastings takes over for York. Throckmorton passes his faltering check while Hastings fails, costing all companies in the ward to lose a courage. Bad news, but at this point the Irish fold and head for the coast, pursued by Hasting's company.
Worse news is on the way. In the center the Welshmen arrive and the situation is stabilized for Lancaster. The wounded Owen Tudor falls upon a plan; Edward's
company, while powerful, is small. Too many casualties will break it. He decides on the Daggers drawn tactic to maximize casualties, including his own! Edward falls for it- choosing the worst possible card, Tudor wins, causing horrendous casualties.


After the troops were embattled, overall orders were given to each ward. As the Lancastrian, I gave Wiltshire a Grim Advance, allowing him to pick one Flight arrow attack, two Sheaf, two Approaches and one Steady Attack chit. These are placed on the small order sheet that each player keeps off board. Each turn a ward commander must choose one to play that his troops will act on. Timing and planning are EVERYTHING in these rules- if you play an "Approach", you can move at a moderate pace and keep order. However an enemy arrow barrage can stop you dead, causing you to discard your approach. Then you only have one left! You might want to halt on your own so you can shoot at the enemy, leaving you with only a Steady attack chit to reach the enemy- unfortunately if he's too far away or there's another change of plan, you'll have nothing left to get you to the enemy, which means you'll be forced to perform on tired attacks. It is an elegant and clever system that is easy to use and a sort of game-within-a-game!
Now on to the battle
Wards alternate acting based on a chit put each turn. Each ward has a representative chit placed in a cup (our group bought a $1 brass chalice at a Salvation Army shop just for ACOP). Since Edward of March is an Audacious commander, the Yorkists get a Choice chit meaning he can choose the next ward to act. Lethargic and Treacherous ward commanders get other chits thrown in, but there are none in this battle.
Herbert started a grim advance towards Wiltshire, as did Edward towards Owen Tudor. Even Wenlock advanced on Pembroke. The Yorkists were on the move! Pembroke and Wiltshire began quick advances, fearful of enemy archery. Owen Tudor, according to plan, awaited Edward, his archery ready to fire off everything they had at the oncoming enemy.